Google Search is a reliable tool for finding content on your WordPress site. In this article, HOSTVN will show you how to add Google Search to WordPress.
Benefits of using the Google Search feature in WordPress
Google is one of the best search engines globally and it provides a free Google search engine for your WordPress site to find more accurate and relevant content.
Another benefit of using the Google search feature in your WordPress site is speed. It is the best search engine for small or large websites in terms of search quickly.
Add Google Search to WordPress
Step 1: Install the WP Google Search Plugin
First, install and activate the WP Google Search Plugin. If you don't know how to install plugins, please see this WordPress plugin installation guide HOSTVN.

Step 2: Sign up for Google Search Engine ID
The next step you need to create Google Search Engine ID by access Google Custom Search and sign in with your Google account. Click here New search engine and fill in the required parameters

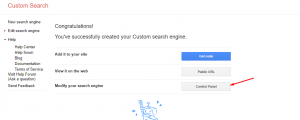
After clicking Create you will see a notification that the custom search engine has been created successfully. Next, click on the button Control Panel.
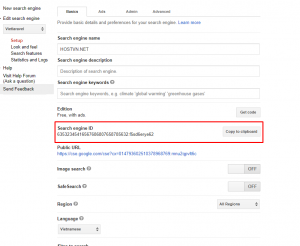
Here you can set up some customizations to your liking. After setup is complete please copy again Search engine ID to use
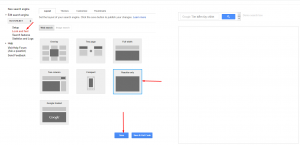
Next visit Look and feel and choose Results only and click on Save. You can also customize it to your liking.
Step 3: Configure plugins
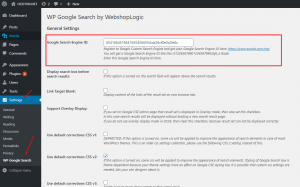
Come back next wp-admin -> Settings (Settings) -> WP Google Search and fill Google Search Engine ID. Don't forget to scroll to the bottom of the page and click Save changes to save settings.
Step 4: Put the search box into the widget
After having set up Google Search Engine ID please visit Appearance -> Widgets. Drag and drop Widget WP Google Search (WGS) in the position you want
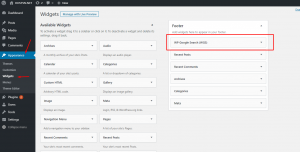
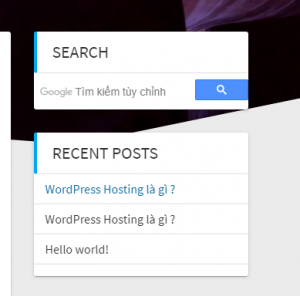
You can then go to the homepage and check if the Search box is displayed
Conclude
Through this article HOSTVN I showed you how to add Google Search to WordPress. If you have any comments you can leave a comment below.
